Chloe and Isabel

Lemonade Stand Popsicles

June 18, 2012

Hot time, summer in the city…and we’ve got a delish treat to cool you off! These lemonade stand popsicles have us drooling. Yes, drooling. Not only are they pretty but they are pretty tasty to boot!

LEMONADE BASE RECIPE

  • 1 cup sugar
  • 1 cup room temperature water
  • 3 cups cold water
  • 1 cup lemon juice

For PINK LEMONADE

  • 3 teaspoons grenadine

For PASSION TEA LEMONADE

  • 4 Tazo Passion tea bags
  • 3 to 4 cups boiling water

Directions

1. Create simple syrup: Combine the sugar and water in a small saucepan and place the saucepan over medium heat. Stir the mixture occasionally to help it dissolve. Remove from from the heat when the sugar has completely dissolved. Set aside to cool.

2. Pour the lemon juice (either fresh squeezed or store bought is fine) into a pitcher. Dilute the lemonade with the cold water, then add the simple syrup and stir thoroughly to combine.

3. Create additional batches of the basic lemonade for the other flavors. To create pink lemonade, add the grenadine and stir thoroughly to combine. To create the Passion tea lemonade, steep the tea bags in the boiling water. If you’d prefer a stronger Passion flavor, use a lower amount of water, as the lemonade will dilute it (I generally use, and recommend, only three cups for a more concentrated flavor). Set the tea aside to cool, then combine with the base lemonade recipe.

4. Assemble popsicles: Arrange a line of small paper cups in a line and pour in the desired amount of lemonade. When all cups are filled with their first flavor layer, carefully transfer them to the freezer and let them set for about 30 minutes or until almost solid through – soft enough to insert the stick, but firm enough to support it. Insert the popsicle stick part way through the first layer (but not clean through to the bottom of the cup). Transfer the cups back to the freezer to allow the first layer to set completely.

5. Continue adding layers of the various flavors as desired! Make sure each layer freezes before adding the next in order to get the pretty color separation!

After the last layer is frozen, serve when ready by ripping open the paper cup and voila…cool off with a lemonade pop!

, , ,

Comments

Peanut Butter + Chocolate Popsicles

June 8, 2012

There’s nothin’ sweeter on a warm, spring day than a cool, delish treat! We spotted these pb + chocolate pops and just had to share this super-simple recipe with you. They’re the perfect accompaniment to a sunny weekend with your besties. Enjoy!

Ingredients

3/4 cup creamy peanut butter
1/2 teaspoon vanilla
1 cup whole milk
1/2 cup heavy cream
1/2 cup confectioner’s sugar
Pinch of salt
1/2 cup chocolate chips
2 tablespoons canola oil

Directions

1. Combine ingredients: Using a blender, combine the first 6 ingredients until well-blended and creamy.

2. Fill popsicle molds: If using conventional molds, divide the mixture between the molds and freeze until solid, about 5 hours. If using shot glasses or other unconventional molds such as paper cups, freeze until the pops are beginning to set, then insert the stick and freeze until solid, 4 to 5 hours.

3. Make chocolate for dipping: To create chocolate coating, microwave the chocolate chips for about 1 minute or until nearly melted. Mix in the canola oil, stir until thoroughly incorporated, and set aside until cooled.

4. Dip popsicles in chocolate: Place the chocolate coating in a shallow dish like a small ramekin and quickly dip the frozen peanut butter popsicle into the chocolate. The chocolate coating will harden nearly instantly. Serve immediately, or return popsicles to freezer until ready to serve.

, , , , ,

Comments

How to: Frosting Flowers

April 13, 2012

It’s not a garden party without flower accents!

We think these frosting flowers atop any sweet treat are the perfect touch for a spring get-together. Here’s how we do it!

Cupcakes:

Simply use your favorite boxed cake mix — make it easy as possible on yourself, because the flowers take time! Since it’s easiest to do frosting designs on flat surfaces, try to only fill the paper cups about halfway to keep them from rising above the rim of the pan while baking. If they do rise a little bit, dry gently pressing down on them with a paper towel while still warm — or if all else fails, carefully slicing the top off! Once you have a flat cupcake, you are ready to become a frosting artist!

Frosting flowers:

What you need…

1 package pink buttercream frosting, or white frosting with pink food coloring

1 pastry bag to put frosting in 1M tip, or any large open star or rose tip

How-to:

1.Hold bag so tip is at an angle. Position opening just above cupcake and gently squeeze.

2. Guide tip in circular motion counterclockwise while still squeezing.

3. When you’ve piped a full circle, guide tip to center of frosting circle. Stop squeezing, then lift tip.

4. Optional: add leaves with a green frosting by holding bag at a 45 degree angle to practice surface with back of bag pointing to your chest. Squeeze with a heavy pressure to build up base; then pull tube straight up and away from surface as you relax pressure and draw leaf to a point, stopping pressure.

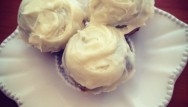
Our designer Ying made her frosting flowers the size of the entire cupcake (seen below)! Simply scrumptious…

, , , , , , ,

Comments

Next Page »
Feedback Form